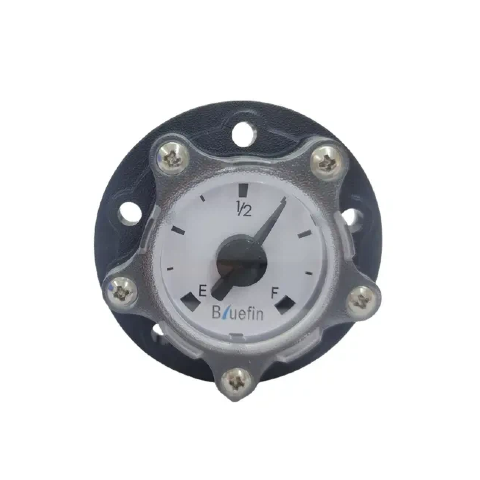
A good gauge can still give poor results if it is installed in the wrong place or matched badly to the tank. That is why Mechanical Level Gauges should be installed with the same care used when selecting them. Bluefin Sensor Technologies Limited develops level-sensor, float-switch, and gauge solutions for fuel, diesel, and water systems, and correct installation is one of the main reasons a side-mounted gauge performs accurately and lasts longer.
When a Side-Mounted Mechanical Level Gauge Makes Sense
Tank designs that benefit from side mounting
A side-mounted design is often a practical choice when top access is limited or when the operator needs to read the level from the side of the tank. This is common in generator tanks, equipment fuel tanks, compact machinery layouts, and some industrial storage systems.
It also helps when the top of the tank is already occupied by other components. In these cases, side mounting can improve visibility and make the gauge easier to use in daily operation.
Why mounting style affects reading quality
Mounting style is not only about where the gauge fits. It affects float movement, display visibility, and how closely the reading matches the real tank level. A poor mounting position can reduce accuracy even if the gauge itself is well made.
What to Check Before Installation Starts
Confirm tank dimensions, fluid type, and mounting standard
Before installation, check the tank depth, the usable measurement range, and the mounting connection. The thread or flange must match the tank opening correctly, or sealing and fit problems may appear immediately.
The liquid also matters. Fuel, diesel, water, and oil applications may require different materials, float behavior, and sealing performance. A gauge should match the medium, not just the tank size.
Make sure the gauge matches the application
The installer should confirm that the gauge is designed for the actual job. A model suitable for one liquid or operating condition may not perform equally well in another. Vibration, weather exposure, and temperature changes should also be considered before installation begins.
Prepare tools, seals, and safety procedures
The mounting surface should be clean, the sealing materials should be ready, and the tank should be in a safe condition for service. Rushed installation often leads to leakage, poor alignment, or unreliable reading later.
Step 1: Choose the Correct Mounting Position
Avoid locations that interfere with float movement
The gauge should be mounted where the float can move freely. Internal baffles, narrow walls, pipes, and structural parts can block float travel and create inaccurate readings.
This is especially important in tanks that were not originally designed around the gauge. The outside may look suitable while the inside still causes interference.
Think about operator visibility and service access
The gauge should be easy to read after installation, not just easy to attach. It should also remain accessible for inspection and service. A visible and reachable gauge is more useful in daily work and easier to maintain over time.
Why level reference matters
Mounting height affects how the gauge shows empty, half-full, and full conditions. If the reference position is wrong, the display may not match the usable tank content as well as it should.
Step 2: Install the Gauge Body and Seal It Properly
Align the gauge carefully to prevent stress and misreading
The gauge body should be installed in proper alignment. If it is twisted or forced into place, internal friction may increase and the reading may become less stable. A gauge can look secure from the outside and still suffer from poor alignment inside.
Seal connections correctly without over-tightening
The seal should be tight enough to prevent leakage, but not so tight that the gasket deforms or the body is stressed. Many leakage problems begin during installation, not during long-term operation.
Verify that the assembly remains stable under vibration
For generators, mobile tanks, and industrial machinery, vibration can affect long-term stability. After installation, the assembly should be checked to make sure it remains secure under normal working conditions.

Step 3: Check Float Travel and Reading Response
Make sure the float moves freely through the working range
Before final use, confirm that the float can travel through its full range without obstruction. Restricted movement is one of the most common reasons for unstable or misleading readings.
Compare the display movement with the expected tank level
The visible indicator should respond in a way that matches the actual liquid position. Even a simple comparison between liquid level and display movement can reveal installation problems early.
Identify early signs of installation-related problems
Signs such as sticking movement, unstable display response, or readings that seem out of proportion usually point to mounting errors, interference, or poor alignment. These issues are easier to correct during installation than after full operation begins.
Step 4: Test the Gauge Under Real Operating Conditions
Readings during filling, emptying, and idle conditions
A static check is not enough. The gauge should also be observed while the tank is being filled and emptied. Some problems only appear when the liquid is moving.
What changes under vibration, slosh, or uneven ground
Mobile equipment and outdoor tanks often experience vibration or liquid movement. The installer should understand what reading behavior is normal for the application and what suggests a setup problem.
Why a short commissioning period saves later maintenance time
A short commissioning period helps confirm that the gauge is working correctly before it becomes part of daily operation. This small step can reduce later service time and improve user confidence.
The Most Common Installation Mistakes to Avoid
Wrong gauge length or wrong mounting pattern
A gauge that does not match tank depth or mounting pattern may still be attached, but the reading will not be dependable. Good installation starts with correct specification.
Poor sealing and leakage risk
Improper sealing, dirty mounting surfaces, and over-tightening are common causes of leakage. These problems are avoidable, but only if sealing is treated carefully.
Installing without considering tank geometry
Tank geometry affects float travel and reading range. Installing without checking the internal layout can produce a gauge that moves, but does not measure accurately enough to be useful.
Pre-Installation Checkpoints for a Side-Mounted Mechanical Level Gauge
Item to confirm | Why it matters | What can go wrong | Installer action |
Tank depth and geometry | Determines float travel | Wrong range or blocked movement | Check usable tank dimensions |
Fluid type | Affects material compatibility | Poor performance or wear | Match gauge to the medium |
Thread or flange standard | Ensures correct fit | Leakage or weak mounting | Confirm the opening standard |
Mounting location | Affects visibility and movement | Poor reading or interference | Check both inside and outside |
Seal selection | Protects against leakage | Deformation or leaks | Use the right sealing method |
Operating environment | Influences long-term stability | Vibration-related problems | Review real working conditions |
How Bluefin Sensor Helps Simplify Installation
Matching the gauge to the tank before shipment
Installation becomes easier when the gauge is already matched to the tank size, liquid, and mounting style. Bluefin Sensor supports application-based matching to reduce avoidable installation problems.
Choosing the right thread or flange option
Correct connection choice is one of the most important parts of a successful installation. A properly matched thread or flange improves fit and helps reduce sealing risk.
Why application-based customization reduces installation risk
Customization helps because not all tanks are alike. A gauge selected around the real application usually installs more smoothly, reads more consistently, and supports better long-term use than a generic option.
Conclusion
Good installation is not just about fixing a gauge onto the tank. It protects reading accuracy, product life, and user confidence from the beginning. For fuel, water, diesel, and equipment systems, Bluefin Sensor Technologies Limited provides practical solutions designed around real operating conditions, and a properly installed side-mounted level gauge will always deliver better results when it is matched to the actual tank layout. If you are preparing a project or improving an existing setup, contact us to discuss the right solution.
FAQ
1. When should I use a side-mounted mechanical level gauge?
A side-mounted mechanical level gauge is useful when top access is limited or when side visibility is better for the operator and service team.
2. What should I check before tank gauge installation?
You should check tank depth, fluid type, mounting standard, internal clearance, and sealing requirements before installation starts.
3. Why does mounting position affect reading accuracy?
Mounting position affects float movement, display visibility, and how well the reading matches the real tank content.
4. How can I reduce installation problems with mechanical level gauges?
You can reduce installation problems by selecting the right model, checking tank geometry in advance, sealing correctly, and testing the gauge under real operating conditions.


